Taking screenshots is an essential skill, especially in today’s digital world where sharing what you see on your screen can be crucial for work, education, or personal use. If you own a Surface Laptop, you have several methods at your disposal to capture screenshots. This article will provide a detailed guide on how to screenshot on a Surface Laptop, covering various methods, tips, and tools.
Using Keyboard Shortcuts
Keyboard shortcuts are among the quickest and most convenient ways to take screenshots on a Surface Laptop. Here are the primary shortcuts you can use:

PrtScn (Print Screen)
Pressing the PrtScn (Print Screen) key captures the entire screen and copies it to your clipboard. You can then paste the screenshot into an image editor like Microsoft Paint or directly into a document or email. This method is simple and effective, especially when you need to capture everything on your screen.
Alt + PrtScn
If you only want to capture the active window, press Alt + PrtScn. This shortcut captures only the currently focused window, ignoring the rest of your screen. This method is perfect for when you need to highlight a specific application or window without the clutter of other open windows.
Windows + Shift + S
For more control over what you capture, use the Windows + Shift + S shortcut. This opens the Snip & Sketch tool, allowing you to select a portion of your screen. After pressing these keys, your screen will dim, and you can use your mouse to draw a rectangle around the area you want to capture. The screenshot is copied to your clipboard and can be pasted or saved using an image editor.
Using the Snip & Sketch Tool
The Snip & Sketch tool offers a versatile way to take screenshots with additional options for editing and annotating your images. Here’s how to use it:
ADS
✓ Banner Ads
✓ Sponsored Posts
✓ Homepage Ads
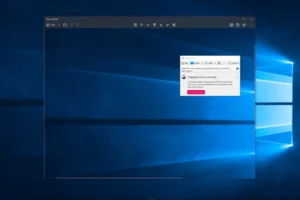
Open Snip & Sketch:
You can find Snip & Sketch by searching for it in the Start menu or by pressing Windows + Shift + S.
Start a New Screenshot:
Click the “New” button in the upper-left corner to begin a new screenshot. The screen will dim, and you’ll be able to choose from four shipping options:
Rectangular Snip: Draw a rectangle to capture.
Freeform Snip: Draw any shape you like to capture.Window Snip: Capture an entire window.
Fullscreen Snip: Capture the entire screen.
Edit and Save: Once you’ve taken your screenshot, it will appear in the Snip & Sketch window. Here, you can annotate the image using the provided tools, such as a pen, highlighter, or eraser. After editing, you can save the image by clicking the disk icon or share it directly from the app.
Using the Surface Pen
If you have a Surface Pen, you can take screenshots quickly with just a double-click of the pen’s top button:
ADS
✓ Banner Ads
✓ Sponsored Posts
✓ Homepage Ads
Double-click the Surface Pen:
Double-clicking the top button on your Surface Pen will dim the screen and allow you to drag a box around the area you want to capture.
Edit in Snip & Sketch:
The captured area will automatically open in Snip & Sketch, where you can edit, annotate, and save the screenshot. This method is particularly useful for users who prefer using the pen over the keyboard or mouse.
Using the Power and Volume Down Buttons
For users with Surface Laptop models that include a touchscreen, you can take a screenshot using the physical buttons:
Press Power and Volume Down:
Hold down the Power button and the Volume Down button simultaneously. The screen will briefly dim, indicating that a screenshot has been captured.
Locate the Screenshot:
The screenshot is automatically saved in the Screenshots folder within the Pictures library. This method is handy when you need to take quick screenshots without using the keyboard.
Using Third-Party Applications

While the built-in tools on the Surface Laptop are powerful, you might need more advanced features such as instant sharing, cloud storage, or more comprehensive editing options. In such cases, third-party applications can be very helpful:
Lightshot:
Lightshot is a popular screenshot tool that allows you to capture a selected area, edit screenshots immediately, and share them online or save them to your local drive.
Greenshot:
Greenshot is another powerful tool that offers a range of features, including capturing specific areas, windows, or full screens, and provides options to annotate, highlight, and obscure parts of your screenshot.
These applications provide additional flexibility, especially if your screenshot needs to go beyond what the standard tools offer.
Capturing screenshots on a Surface Laptop is straightforward, thanks to the variety of methods available. Whether you prefer quick keyboard shortcuts, the detailed Snip & Sketch tool, or the simplicity of the Surface Pen, there’s a method that will suit your needs. For more advanced requirements, third-party applications offer even greater flexibility. Understanding these options ensures you can easily capture and share the information displayed on your screen, making your Surface Laptop an even more powerful tool.